


It can happen that security cameras collect moisture or water inside the housing and there are a few options on how to dry them off. Normally, the security camera should be weatherproof and no water should go inside. However, over time the water or moisture may get accumulated and you need to remove it before damaging the camera.
Moisture inside the camera may short circuit and burn the motherboard and that is something that it’s not easy to fix. Most of the time you need to replace the camera altogether. In other cases, the moisture inside the camera’s lens (or outside) may distort the image and decrease the quality of the camera’s feed.
If you notice moisture or water residue inside the camera, then you should clean it up as soon as possible. In this article, we will show a few basic ways how to remove moisture from the camera and how to improve the camera’s protection against elements.
How to remove and avoid moisture from security cameras?
You can remove the moisture from CCTV cameras by using a piece of cloth, silica gels packets, anti-fog spray, weatherproofing the connections, etc. For more details, check the entries below.
Wipe the moisture with a microfiber piece of cloth
To remove moisture from security cameras, you may essentially wipe the external glass covers (not the focal points) with a microfiber material, which won’t leave any water spots. Just clean the glass, not the camera sensor (inside the camera). If you want to wipe off the camera sensor, make sure not to damage it or leave any fingerprints. Any residue may affect the image quality.
Another method to remove or dry off the moisture inside a security camera is by using a hairdryer to warm and dry the water. Keep the hairdryer at a safe distance from the camera and avoid melting the plastic (feel it with your fingers).
You can wipe off the lens with a cloth while the dryer blows warm air. A few minutes later and any moisture will be gone.
Anti-fog spray on the glass
If the moisture issue happens continuously in your camera, then you can apply a layer of anti-fog spray on the camera’s glass cover. This spray will protect the camera from creating any moisture in its glass.
We’d recommend using this spray if your cameras are installed in a location with high humidity or a long rainy season. Keep the spray’s nozzle from a distance and apply the layer in slow motion all over the cover.
Use silica gel packets
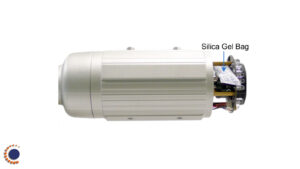
Also, you can use silica gels packets inside the camera’s housing. These desiccant materials will absorb any humidity from the air and keep the camera moisture-free. Their size is relatively small and is able to easily fit in tight spaces.

Usually, most of the newer cameras come by default with silica gels placed close to the motherboard. If they don’t, you can buy some online and place them inside the camera’s body. You can install as many as you want to, the more – the drier the air will be.
Purchase waterproof cameras
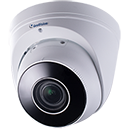
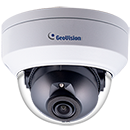
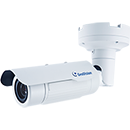
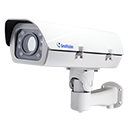
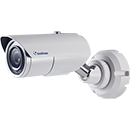
If you plan to install the camera outdoors, you must select a weatherproof camera to ensure that the camera will operate properly when exposed to the elements. These cameras are a little bit more expensive than the regular ones but are worth it because you’ll save money in the long run. Eventually, regular cameras will get water inside, which means you’ll need to spend more money to replace them.
The weatherproof security cameras are labeled as IP67 rated. This rating means that the camera is certified to work properly when exposed to elements such as heavy rain, heavy snow, freezing temperatures, and humidity. Their housing is sealed and the water cannot penetrate inside. Moreover, they come with silica gel parcels to keep the hardware dry and moisture-free.
Additionally, you can use special housing to place the camera inside and protect it from elements. Some housings come with an internal fan that runs continuously and keeps the inside temperature steady. However, if the camera is already weatherproof rated, then there’s no need to spend money on special housing. It won’t hurt, but it may be overkill.
There’s already moisture on the security camera, how to remove it?
In the event the moisture buildup is already in the security camera, you may need to uninstall the camera and open it up for a quick inspection. Check if it’s just moisture or the water (or water residue).
You may utilize a tiny fiber fabric or hairdryer to clear off the moisture. Pay attention to the image sensor and ensure it’s super clean, Any residue, dust specs, or fingerprint may compromise the image quality of the camera. The light may bounce off these imperfections and wash out the image.
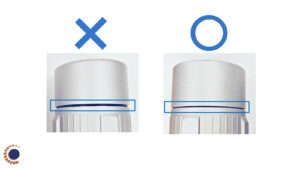
Once the cleaning is done, close the camera’s cover carefully and ensure that it’s sealed. These cameras have a rubber ring that needs to be placed correctly between the camera’s body and the cover. Usually, there’s a groove where this rubber ring goes in. It’s a very important step that needs to be done with precision. Then install the camera on its spot.
Additionally, it’s crucial to waterproof the cable connection. Quite often the water goes to the camera through the RJ45 connector. Ensure you’re using a weatherproof connector, use insulants around the connector to increase the protection.
Source: Security Cam Center